MakerBot CupCake CNC
CRASHspace MakerBot "CRASHbot"
Serial Number: 000962
Batch XII
See also:

This page is meant to serve as information about the current status, and allow coordination of efforts to keep our MakerBot operational.
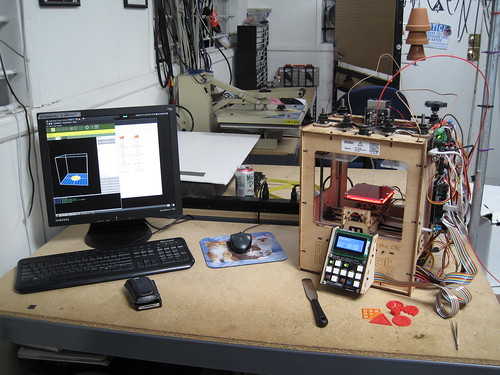
The Crash Space MakerBot is located on the middle bench of the larger shop (shop one).

The Dell Dimension 3100 on the shelf below it has ReplicatorG 0026 installed on it and is used to run the MakerBot. Use the Microsoft keyboard and Logitech mouse.
ReplicatorG can open STL files directly, and has an integrated Skeinforge to generate gcode. It can also do some simple STL editing - mostly rotate and scale.
Because of the upgrades to the machine, there is a custom driver/machine definition. It is called "Cupcake w/ HBP and Stepstruder Mk6". For everything to work correctly, this should be chosen from the Machine -> Driver menu.
We are currently using Skeinforge 35, and this should be selected as the default GCode generation tool ( GCode -> Choose GCode Generator -> Skeinforge (35) )
Use the SF35-CRASHbotMk6-0017 profile for G-Code generation.
The tools and misc. parts are in a labeled plastic bin.
IN GENERAL, you should not need to adjust the leveling of the bot. Unless someone messes with it. So if you don't mess with it, no one will have to fix it.
The Z platform should be level relative to the body of the bot, and is best done by eye using the hash marks on the side of the bot.
The build platform should be level relative to the X/Y action, and can be adjusted with the hex nuts at the base of the platform. These are nylock nuts and should not vibrate loose, so you should only have to do this if someone messes with things.
You will need the tweezers to pluck filament out of the extruder.
There is a small flexible spatula that can be used to knock prints off the build surface. Prints remove pretty easily when the build surface gets to 80 C.
PUT THE TWEEZERS AND SPATULA BACK IN THE TOOL BOX. Please.
Mk6+ Stepstruder
We have a Mk6+ Stepstruder. It works really well and avoids almost all of the problems of the Mk4/Mk5 Plastruders.
To support the Mk6, we upgraded to the Generation 4 electronics, and so we have a thermocouple, which means our temperatures are now perfectly accurate.
Heated Build Platform
We have a heated build platform (HBP).
With the Mk6 and the diecut Kapton surface, it works very well at 120 C. Parts release easily at 80 C. The blue painters tape is no longer necessary.


Relay Board
The relay board is still mounted to the side of the bot, but because of the Gen 4 electronics, it is no longer needed, and is not connected to anything.
The HBP is connected to the extruder controller via the A6 header and the "EXTRA" terminals.
Gen 4 Interface
We have a Gen4 Interface which lets you monitor the extruder and platform temperatures (ReplicatorG only allows you to monitor the extruder temperature) and to print from SD card without using a computer.
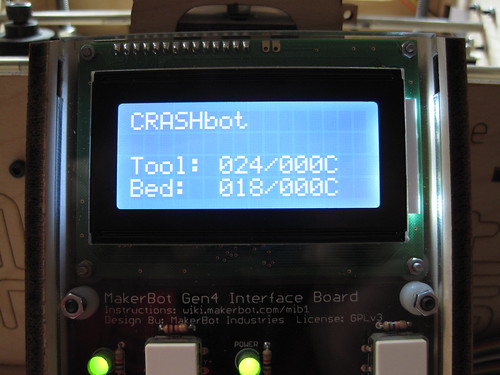
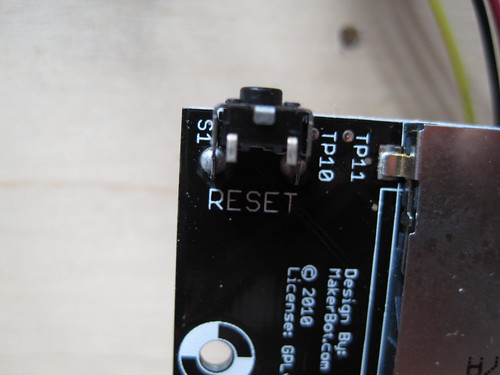
The interface will turn on with the MakerBot, but sometimes it will not register correctly when the printer is connected to a computer when turned on. If this happens, you can just press the reset button. It's at the top left corner of the motherboard and should make everything work correctly.
News:
2011-10-27 - Adding MakerBot Resources page to wiki with links to profile, and models.
2011-10-16 - The bot is now working very well. The first MakerBot 101 class run with the actual CRASHbot is taking place today. The bot should be back living at the space after I get the documentation all completed, probably on Tuesday.
2011-03-22 - Much has happened and the wiki has not been updated. The Mk5 Plastruder went out of service for a while, but it seems to be back. But one of the relays appears to be going bad. And the Mk5 motor needs to be swapped out. But all of this should change with the new Mk6. More updates as things change. Promise.
2010-08-17 - CRASH Space Plastruder mounted in machine. It extrudes but not reliably while printing. Added double-wide idler wheel as a fix. Doesn't seem to help. Putting New Blankets Plastruder back in bot.
2010-08-17 - Relay board added to drive HBP.
2010-08-03 - RAM! 2 GiB RAM added to the Dell, and now everything works so much better. Run ReplicatorG and Firefox at the same time, even!
Also, the CRASH Space Plastruder has been rebuilt, fixing the cracked retainer plate, and adding the Mk5 gear, but the idler wheel is now too loose. Tod will cut us a double-wide idler wheel to use.
2010-07-27 - New computer! No more crashes! (We hope.) This machine is a little RAM starved, but 2 GB RAM are on order which should make things snappier.
2010-07-13 - Heated Build Platform is built, tested, and works! Also have updated the firmware of both motherboard and Plastruder. Heat management is now much improved with the new firmware. This, of course, changes the print parameters a bit and we need to re-figure it out.
2010-07-06 - We have received the Heated Build Platform kit to add to the bot. Also, there is a work-in-progress usage/printing guide on the wiki here.
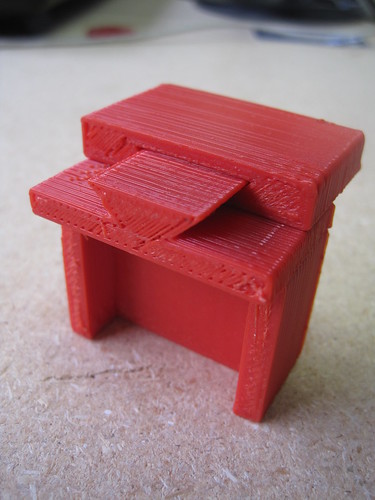
2010-06-20 - Printed the biggest part yet - a RepRap bed clamp - using ReplicatorG 0017. Turned out very nicely.
2010-06-01 - A very flat print (flatter than the picture looks). No raft, no changes to G-code. Shimming the Z axis rods must have been a very good idea.
I was doing a demo for some visitors and it came out very nice. There are still some issues, probably with SkeinFox settings rather than with the Bot itself.

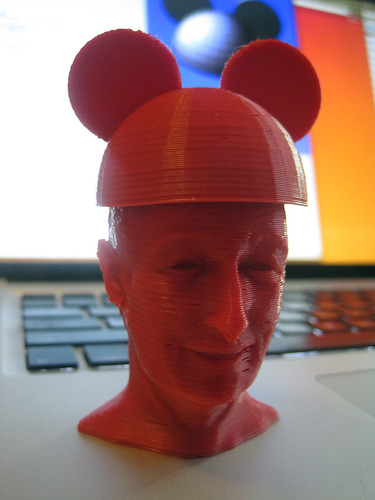
2010-05-18 - OUR FIRST PRINT!


We borrowed the Plastruder from the New Blankets MakerBot to see if we could actually print something and it turned out surprisingly well. There are some issues still, but nothing huge.
Current Issues:
(If anyone does or plans to do any of the following, please leave a note saying so, and also to indicate the outcome.)
- The Skeinforge profile could use some additional tweaking. If you experiment, create a new profile and let me know if you find something that works well. (Theron, 2011-10-16)
Solutions:
- Y and Z axis movement have been corrected. Cable from stepper motor has been reversed on Y and Z stepper motor control boards. PLEASE NOTE that these look like they are on backwards (because they are). The X axis motor cable is Yellow, Pink, Black, Orange (from top) but the Y and Z axis cable are Orange, Black, Pink, Yellow (from top). If these get disconnected for some reason, put them back the same way. (Theron, 2010-05-15)
- Plastruder idler wheel tension has been corrected. The MakerBot now extrudes! (Theron, 2010-05-15) Strike that - it keeps slipping. See issues above.
- Idler wheel tension is a non-issue with Mk5 Plasturder. (Theron, 2011-03-22)
- The New Blankets MakerBot Plastruder has temporarily been installed in the Crash Space MakerBot until we can repair ours.
- The skate bearings used to hold the Z-axis rods are a bit loose, and if you don't get the rod exactly centered when tightening the nuts, they rotate eccentrically. Tom had the excellent idea of shimming the bearings with some cut-up soda can (Pepsi), which reduced the play considerably. Z-axis rods now rotate much more evenly. (Theron, 2010-05-25)
- Z-axis rods were binding a bit, which caused a stutter in Z-axis movement. The top bearing retaining plates were pinching the top bearings a bit. Lowered the bearings and now all three rods spin much more smoothly. The Z-axis platform now moves very nicely. (Theron, 2010-05-25)
- The New Blankets Plastruder is apparently prone to breaking the ABS filament, which then gets caught in the thermal barrier. This may have something to do with the way the barrel is attached to the gear acrylic gear box. I removed the barrel and pulled out the broken ABS, and now the filament moves through the barrel. (Theron, 2010-05-30)
- The bearing on the extruder motor of the New Blankets Plastruder has a tendency to fall out during a print. I'm not even sure why they used a bearing there - it is not strictly necessary. If it falls out, just press fit it back into place after the print is complete. (Theron, 2010-06-12)
- The Z stage started slipping again. Turns out the nut beneath the top bearing of one of the Z axis rods worked its way down the threaded rod. The bearing in turn slipped out of position, so that Z axis rod became very wobbly. We re-adjusted the rod, oiled it, and replaced the shim on the bearing. (Theron, 2010-06-12)
- We have a Heated Build Platform! Well, we have the kit. Needs to be assembled. (Theron, 2010-07-06)
- A work-in-progress usage/printing guide has been started. Check it out. (Theron, 2010-07-06)
- EMachines POC has been replaced with the slightly better (and definitely more stable) Dell. Thanks to Chris for getting Ubuntu 9.10 installed where I failed. (Theron, 2010-07-27)
- The firmware on both the motherboard and extruder have been updated and they seem to work a lot better. The temperature stability is much improved, so even without PID calibration, the temperature is rock steady. The New Blankets Plastruder is still about 20 degrees out of whack, but it seems to be constant. (Theron, 2010-07-27)
To Do:
- Get a Plastruder Mk5 when available. They had a couple at Maker Faire and there are many improvements. Should be available any time now.
- Add Mk5 gear (which we have) to Crash Space Plastruder Mk4 once fixed. Other operators seem pretty happy with this upgrade.
- Add double-wide idler wheel to the CRASH Space Plastruder - the Mk5 gear has a wider tooth area, and the original idler wheel rattles around a bit.
- Calibrate ReplicatorG settings to correct temperature overshooting.
- Create tutorial on how to prepare models and print. This could be the result of some classes on modeling and 3D printing.
- Print out some replacement/upgrade pieces.
- Replace relay board (though it becomes unimportant with Mk6 Stepstruder)
- Upgrade to Gen 4 electronics
Comments (0)
You don't have permission to comment on this page.